
Meter TWS Earbuds Instructions: A Comprehensive Guide
Welcome to your comprehensive guide for using Meter TWS earbuds! This manual will walk you through every step. From powering on and pairing to troubleshooting, we’ll ensure you have a seamless audio experience. Get ready to enjoy wireless freedom!
Overview of Meter TWS Earbuds
The Meter TWS earbuds offer a truly wireless listening experience, freeing you from tangled cords and providing exceptional sound quality. Designed for comfort and convenience, these earbuds are perfect for workouts, commutes, or relaxing at home. They boast Bluetooth 5.0 technology, ensuring a stable connection within a 10-meter range, allowing you to move freely without signal loss.
These earbuds feature intuitive touch controls, letting you manage music playback, answer calls, and activate voice assistants with ease. The included charging case provides multiple additional charges, extending your listening time significantly. With a sleek and ergonomic design, the Meter TWS earbuds offer a secure and comfortable fit for hours of listening pleasure. Their compact size makes them easily portable, fitting effortlessly into your pocket or bag.
The Meter TWS earbuds are engineered for superior audio performance, delivering rich bass, clear mids, and crisp highs. Whether you’re listening to your favorite music, podcasts, or audiobooks, these earbuds provide an immersive and enjoyable listening experience. They are designed to enhance your daily life with seamless connectivity and exceptional sound quality.
Package Contents
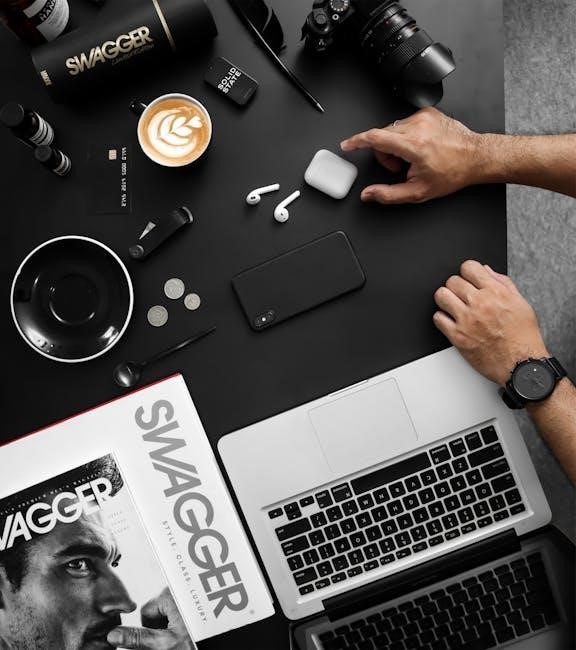
Upon opening the packaging of your Meter TWS earbuds, you should find several key components; The first and most prominent item is the pair of Meter TWS earbuds themselves, carefully nestled within the packaging to prevent damage during transit. These earbuds are your gateway to a wireless audio experience, designed for both comfort and performance.
Accompanying the earbuds is a portable charging case. This case not only protects your earbuds when not in use but also provides multiple additional charges, extending your listening time significantly. Ensure the charging case is fully charged before initial use for optimal performance. You will also find a USB charging cable, used to replenish the power of the charging case. Connect this cable to a power source to keep your earbuds ready for action.
Furthermore, the package includes multiple sets of ear tips in varying sizes (small, medium, and large). These different sizes ensure a secure and comfortable fit for a wide range of ear shapes and sizes. Selecting the correct ear tip size is crucial for optimal sound quality and noise isolation. Finally, you’ll find this user manual, providing detailed instructions and troubleshooting tips to help you get the most out of your Meter TWS earbuds.
Powering On/Off
The Meter TWS earbuds offer a seamless power management system with both automatic and manual options for turning the devices on and off. Understanding these methods ensures you can efficiently control your earbuds and conserve battery life when they are not in use.
The automatic power function is designed for convenience. When you remove the earbuds from the charging case, they will automatically power on, indicated by a blue light that flashes briefly. This feature ensures that your earbuds are ready to connect to your device without any manual intervention. Similarly, when you place the earbuds back into the charging case and close the lid, they will automatically power off, disconnecting from your device and entering charging mode.
For situations where manual control is preferred, you can also power the earbuds on and off manually. To power on, press and hold the main button on both earbuds simultaneously for approximately 3 seconds. A blue light will illuminate and flash, followed by a “Power On” message indicating successful activation. To power off manually, press and hold the same button for about 4 seconds until the LED light turns off, confirming that the earbuds have been powered down.

Automatic Power On/Off

The Meter TWS earbuds feature an intuitive automatic power function. It simplifies the user experience by eliminating the need for manual power operations in most scenarios. This automatic system is linked directly to the charging case, ensuring seamless transitions between active use and standby mode.
To automatically power on your Meter TWS earbuds, simply remove them from the charging case. As soon as the earbuds are taken out, they will detect the change in status and initiate the power-on sequence. This process is indicated by a brief flash of a blue LED light on each earbud, signaling that they are now active and ready to pair with your device.
Conversely, powering off the earbuds is equally effortless. All you need to do is place the earbuds back into their designated slots within the charging case and close the lid. The act of closing the lid triggers the automatic power-off mechanism, disconnecting the earbuds from your paired device and conserving battery life. This automatic function ensures that your earbuds are always ready when you need them and efficiently powered down when not in use, maximizing their battery performance and lifespan.
Manual Power On/Off
While the Meter TWS earbuds are designed for automatic operation, manual power controls are available for situations where the automatic function might not be feasible. This provides users with greater control and flexibility over their device’s power state. Manual power control is essential when the charging case isn’t accessible or when troubleshooting connectivity issues.

To manually power on the Meter TWS earbuds, locate the primary button on each earbud. Simultaneously press and hold these buttons for approximately three seconds. Upon successful activation, a blue light will illuminate and start flashing on both earbuds. This visual cue is accompanied by a voice prompt, “Power On,” confirming that the earbuds are now active and ready for pairing.
Similarly, to manually power off the earbuds, press and hold the same primary buttons on both earbuds for about four seconds. The LED indicator will turn off. This manual option ensures that you can efficiently manage the power of your earbuds, regardless of the availability of the charging case or the functionality of the automatic power system, offering a reliable backup method for power management.
Pairing Instructions
Pairing your Meter TWS earbuds with your smartphone or other Bluetooth-enabled device is a straightforward process. The initial pairing is crucial for establishing a connection. Once paired, the earbuds will automatically reconnect to your device, ensuring a seamless user experience. Follow these instructions to successfully pair your earbuds.

First, ensure that your earbuds are in pairing mode. Typically, upon the initial power-on, the LED indicator will flash blue and red alternately, indicating that the earbuds are ready to pair. If not, a manual reset might be needed. Next, activate the Bluetooth function on your mobile device. Search for available devices; “Meter TWS” should appear in the list.
Select “Meter TWS” to initiate the pairing. After successful pairing, the blinking will cease. The LED indicator will either turn off or display a solid blue light. A voice prompt might also confirm the successful connection. If prompted for a password, enter “0000”. Your earbuds are now paired and ready to use. Enjoy your listening experience!
Initial Pairing
The first-time pairing of your Meter TWS earbuds is a crucial step to enjoying wireless audio. To initiate the pairing process, ensure your earbuds are powered on. Upon powering on for the first time, the earbuds should automatically enter pairing mode. This is typically indicated by the LED indicator flashing blue and red alternately.
Next, navigate to the Bluetooth settings on your smartphone, tablet, or other Bluetooth-enabled device. Ensure that Bluetooth is enabled. Your device will begin scanning for available Bluetooth devices. Locate “Meter TWS” in the list of available devices and select it. Your device may prompt you to confirm the pairing or enter a PIN code. If prompted, enter “0000” as the PIN.
Once the pairing is successful, the LED indicator on the earbuds will change. It might turn off, display a solid blue light, or follow a different pattern, as indicated in the product manual. Your device should also confirm the successful pairing, and the earbuds are now ready to use. Enjoy your wireless audio experience!

Reconnecting to a Device
After the initial pairing, reconnecting your Meter TWS earbuds to a previously paired device is a simple process. Ensure that Bluetooth is enabled on your device. The earbuds should automatically attempt to reconnect to the last connected device when powered on. This automatic reconnection typically occurs within a few seconds of powering on the earbuds, provided the device is within a 10-meter range.
If the earbuds don’t automatically reconnect, navigate to the Bluetooth settings on your device. Your Meter TWS earbuds should appear in the list of paired devices. Select “Meter TWS” to manually initiate the reconnection. Once the connection is established, you should hear a confirmation tone from the earbuds, and the device will indicate that it’s connected.

If you’re still facing issues, ensure that the earbuds are not currently connected to another device. Also, try turning Bluetooth off and on again on your device. If problems persist, consider forgetting the device from your Bluetooth settings and repeating the initial pairing process.
TWS Earbud Controls

The Meter TWS earbuds feature intuitive touch controls for managing your audio experience. A single tap on either earbud usually controls play/pause functions, allowing you to easily start and stop your music or podcasts. Answering or ending calls can also often be achieved with a single tap, providing a seamless hands-free experience.
Double-tapping the earbuds typically advances to the next track or rejects an incoming call. Similarly, a triple-tap might navigate to the previous track. Volume control is often managed by long-pressing either the left or right earbud, with one side increasing and the other decreasing the volume levels.
Some models may offer voice assistant activation through a specific tap sequence, allowing you to access Siri or Google Assistant. Be sure to consult the specific model documentation for precise control mappings, as these can vary between different Meter TWS earbud versions. Experimenting with the touch controls will quickly familiarize you with their functions.

Troubleshooting: Unstable Connection
Experiencing an unstable connection with your Meter TWS earbuds can be frustrating. First, ensure your device’s Bluetooth is enabled and that the earbuds are properly paired. Check that your device is within the optimal Bluetooth range, typically around 10 meters, and free from significant obstructions like walls or other electronic devices that could cause interference.
If the connection remains unstable, try resetting the earbuds. This often involves placing them back in the charging case for a few seconds and then removing them. Also, verify that the earbuds’ firmware is up to date, if applicable, as outdated firmware can lead to connectivity issues.
Another potential solution is to clear the Bluetooth pairing history on your device and re-pair the earbuds. If problems persist, test the earbuds with another device to determine if the issue lies with the earbuds or the original device. In areas with high wireless traffic, changing locations might improve connection stability.
Bluetooth Range
Understanding the Bluetooth range of your Meter TWS earbuds is crucial for maintaining a stable and reliable connection. Generally, these earbuds offer a standard Bluetooth range of approximately 10 to 12 meters in an open, unobstructed environment. However, several factors can affect this range, potentially reducing the distance over which your earbuds remain connected to your device.
Physical obstructions like walls, furniture, and even human bodies can weaken the Bluetooth signal, thereby shortening the effective range. Electronic interference from other devices operating on the 2.4 GHz frequency band, such as Wi-Fi routers, microwaves, and other Bluetooth devices, can also impact the range and stability of the connection.
To maximize the Bluetooth range, ensure that there are as few obstacles as possible between your earbuds and your paired device. Keep your device in a location that provides a clear line of sight to the earbuds, and minimize interference from other electronic devices. Remember that the specified range is typically tested under ideal conditions, so real-world performance may vary.
Be the first to reply