TEM6 Air Handler Installation⁚ A Comprehensive Guide
This comprehensive guide details the installation of the TEM6 air handler‚ a versatile unit suitable for various locations like closets‚ basements‚ or attics. It covers pre-installation checks‚ safety precautions‚ site preparation‚ step-by-step installation‚ electrical connections‚ HVAC system integration‚ airflow testing‚ troubleshooting‚ and post-installation verification. The guide ensures a smooth and efficient installation process for optimal performance.
The TEM6 series air handlers‚ manufactured by Trane‚ are designed for efficient and quiet operation in residential and light commercial applications. These versatile units are engineered for installation in a variety of locations‚ including closets‚ utility rooms‚ alcoves‚ basements‚ crawl spaces‚ and attics‚ offering flexibility for diverse HVAC system designs. Key features of the TEM6 series include a variable-speed motor‚ which contributes to reduced noise levels and improved comfort by eliminating temperature fluctuations (“hot and cold spots”). The TEM6 units are designed to seamlessly integrate with various heating and cooling systems‚ providing optimal climate control. Unlike some models‚ the TEM6 series prioritizes quiet operation and consistent temperature distribution. Models within the TEM6 series may vary in capacity and specifications‚ so always refer to the specific model’s documentation for detailed information.
Pre-Installation Checklist and Safety Precautions
Before commencing the TEM6 air handler installation‚ a thorough pre-installation checklist is crucial. Verify that you have all necessary tools‚ materials‚ and components listed in the specific model’s installation manual. Ensure the power supply is disconnected before beginning any work on the electrical connections. Proper personal protective equipment (PPE) must be worn throughout the installation process. This includes safety glasses‚ gloves‚ and a NIOSH-approved dust/mist respirator to prevent inhalation of fiberglass dust during handling. Carefully inspect the unit for any damage sustained during shipping. Check that the selected heater is compatible with the air handler model; refer to the unit’s label and any secondary nameplates for confirmation. Confirm the location meets the unit’s requirements regarding size‚ accessibility‚ and ventilation. Consult local building codes and regulations to ensure compliance. Proper ventilation is essential for safe and effective operation; ensure adequate airflow around the unit. Always prioritize safety and adhere to all safety guidelines outlined in the manufacturer’s instructions.
Location and Site Preparation for Installation
Careful site preparation is paramount for a successful TEM6 air handler installation. Choose a location that meets the unit’s dimensional requirements‚ providing ample space for access during installation and maintenance. Consider factors such as proximity to ductwork‚ electrical connections‚ and accessibility for service personnel. The TEM6 is designed for various locations including closets‚ utility rooms‚ alcoves‚ basements‚ crawlspaces‚ or attics. However‚ ensure the chosen location offers adequate ventilation to prevent overheating and maintain optimal performance. Before installation‚ clear the area of any obstructions. Ensure the floor is level and capable of supporting the unit’s weight. If necessary‚ reinforce the floor or install a suitable platform. Properly prepare the ductwork connections‚ ensuring they are clean‚ sealed‚ and appropriately sized for the TEM6’s airflow capacity. Mark the location of electrical conduits and ensure they are readily accessible for connection to the air handler. Prepare the necessary wiring according to the provided electrical diagrams. Pay close attention to the grounding requirements for safety. Having all these preparations completed prior to beginning the installation will ensure a more efficient and less problematic process.
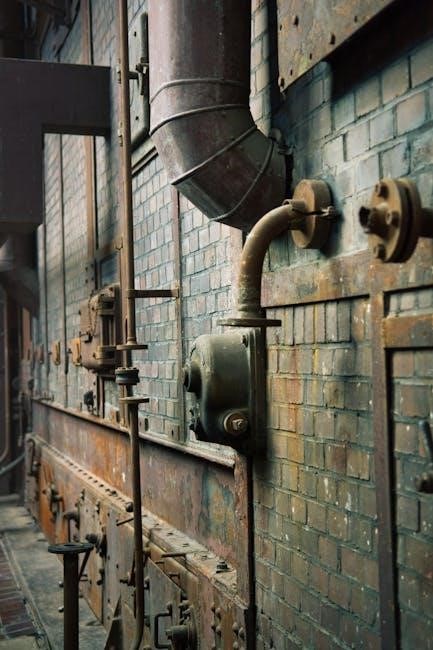
Detailed Installation Steps⁚ A Step-by-Step Guide
Begin by carefully removing the front panels of the TEM6 air handler‚ providing access to internal components. Next‚ remove the coil retaining brackets situated at the front of the drain pan. This allows for easier coil installation and access to other internal components. Securely mount the unit to the prepared location using appropriate fasteners‚ ensuring stability and preventing vibrations. Connect the ductwork to the air handler‚ using the correct sized connections. Ensure all connections are properly sealed to prevent air leakage and maintain optimal airflow. Install the blower access panel‚ securing it firmly. Proceed to connect the electrical wiring according to the provided wiring diagrams‚ paying close attention to voltage and amperage ratings. Double-check all connections for tightness and proper polarity. Install any supplemental electric heaters according to the manufacturer’s instructions‚ ensuring they are compatible with the TEM6. Replace the front panels‚ ensuring they are securely fastened. Before proceeding‚ perform a visual inspection to ensure that all components are correctly installed and there are no visible obstructions or loose connections. Carefully review the checkout list at the end of the installation guide to verify that all steps have been followed correctly and that the system is ready for testing and operation. Remember to adhere to all safety precautions throughout the entire installation process.
Electrical Connections and Wiring Diagrams
Before commencing any electrical work‚ ensure the power supply is completely disconnected to prevent electrical shock. Carefully consult the wiring diagrams provided in the TEM6 installation manual; these diagrams illustrate the correct connections for various configurations and components. Identify the appropriate wires according to the color-coding system and their corresponding terminals on the air handler. Securely connect all wires‚ ensuring a tight and reliable connection to prevent overheating or short circuits. Pay close attention to the voltage and amperage requirements specified for the TEM6 air handler to ensure compatibility with your electrical system. After making all connections‚ carefully inspect each wire and terminal for any signs of damage or loose connections. Use appropriately sized wire nuts to secure wire connections‚ preventing accidental disconnections. If using supplemental electric heaters‚ ensure they are wired correctly according to their individual instructions and that they are compatible with the TEM6 system. Refer to the manufacturer’s guidelines for specific instructions on heater wiring. Once all electrical connections are complete and verified‚ restore power to the system. Carefully monitor the system’s operation for any unusual sounds or electrical issues. If any problems occur‚ immediately turn off the power and consult the troubleshooting section of the manual or contact a qualified technician. Always prioritize safety and adhere to all electrical codes and regulations.
Connecting to the HVAC System
Connecting the TEM6 air handler to your existing HVAC system requires precision and attention to detail. Begin by carefully reviewing the system’s specifications and ensuring compatibility with the TEM6 unit. Use the provided diagrams and instructions to identify the correct connections for refrigerant lines‚ drain lines‚ and airflow ducts. When connecting refrigerant lines‚ ensure proper flaring and leak-testing to prevent refrigerant leaks. Use the appropriate tools and techniques to achieve secure and leak-free connections; this is crucial for optimal system performance and efficiency. Properly insulate all refrigerant lines to prevent condensation and heat loss. Securely connect the drain line to ensure efficient condensate removal; this prevents water damage and maintains optimal system operation. Connect the supply and return air ducts‚ ensuring a proper seal to prevent air leaks; air leaks can impact system performance and increase energy consumption. Ensure that the ducts are sized appropriately for the TEM6 unit to optimize airflow. After all connections are complete‚ inspect them thoroughly to confirm that they are secure and leak-free. A visual inspection should confirm that no refrigerant lines are kinked or damaged. Once the connections are secure‚ proceed to the next stage of the installation process. Remember‚ improper connections can lead to system malfunctions and potential damage. Always follow the manufacturer’s guidelines and consult a qualified technician if any uncertainty arises.
Airflow Testing and Adjustments
After connecting the TEM6 air handler to the HVAC system‚ thorough airflow testing is crucial to ensure optimal performance and efficiency. This involves measuring the airflow at both the supply and return registers using a calibrated airflow meter. Compare the measured airflow rates to the manufacturer’s specifications for the specific TEM6 model. Any significant deviations from the specified rates indicate potential issues that require attention. Check for any restrictions in the ductwork‚ such as kinks‚ obstructions‚ or improperly sized ducts. Addressing these restrictions is vital for restoring optimal airflow. If the airflow is too low‚ investigate the system’s blower motor for possible malfunctions. Ensure the blower motor is operating at its designed speed and that there are no obstructions hindering its operation. If the airflow is excessively high‚ examine the system for any leaks in the ductwork. Seal any leaks discovered to maintain proper air pressure. After addressing any identified issues‚ retest the airflow to confirm that it now aligns with the manufacturer’s specifications. Fine-tuning airflow can significantly impact the system’s overall efficiency and comfort levels. Remember‚ maintaining proper airflow is essential for effective heating and cooling‚ preventing energy waste and ensuring a comfortable indoor environment. Consult the TEM6 installation manual for detailed instructions and troubleshooting tips for airflow issues. If you encounter persistent problems‚ seek assistance from a qualified HVAC technician.
Troubleshooting Common Issues
During or after the TEM6 air handler installation‚ several common issues might arise. Insufficient airflow is a frequent problem; check for ductwork restrictions‚ obstructions‚ or leaks. A malfunctioning blower motor could also be the culprit. Verify its proper operation and speed. If the unit fails to power on‚ inspect the electrical connections‚ circuit breaker‚ and wiring for any faults. Consult the wiring diagrams for accurate connections. Unusual noises emanating from the unit could indicate loose components or worn bearings. Inspect and tighten any loose parts. If the unit is producing inconsistent temperatures‚ examine the refrigerant levels and check for any leaks in the refrigerant lines. Call a qualified technician for refrigerant handling. Inadequate heating or cooling might stem from incorrect thermostat settings or a malfunctioning thermostat itself. Ensure the thermostat is correctly programmed and functioning properly. If the drain pan overflows‚ verify the drain line is clear and unobstructed. Clean or replace the drain line as needed. Persistent issues that cannot be resolved through these basic troubleshooting steps necessitate the involvement of a qualified HVAC professional. They possess the expertise and tools to diagnose and repair more complex problems. Remember‚ improper handling of the unit or its components could void the warranty. Always refer to the TEM6 installation manual for detailed troubleshooting procedures. Attempting complex repairs without proper training can be dangerous and might damage the unit further.
Post-Installation Checklist and System Verification
Following the TEM6 air handler installation‚ a thorough verification process is crucial to ensure optimal performance and safety. Begin by visually inspecting all connections‚ ensuring secure attachments and the absence of any loose components. Check the electrical connections for proper tightness and adherence to the wiring diagram. Verify that the drain line is correctly installed and free from blockages. Inspect the air filter for proper installation and cleanliness. Next‚ power on the unit and monitor its operation for any unusual noises‚ vibrations‚ or leaks. Listen carefully for any unusual sounds that might indicate a problem. Check for any refrigerant leaks using appropriate detection methods. Pay close attention to the unit’s temperature output to confirm it aligns with the expected settings. Test the airflow at various settings to verify it meets the specified requirements. Use an anemometer for precise measurements. Observe the system’s overall performance and note any discrepancies. Ensure the unit’s control panel is functioning correctly and displays the appropriate readings. Document all observations and measurements in a detailed report. Finally‚ perform a functional test of the entire HVAC system. This involves checking all aspects of the unit’s operation and verifying that it integrates correctly with the rest of the system. If any issues are found‚ refer to the troubleshooting section of this manual. If problems persist‚ contact a qualified HVAC technician for assistance. A comprehensive post-installation checklist ensures the longevity and efficiency of your TEM6 air handler.
Maintenance and Service Recommendations
Regular maintenance is key to prolonging the lifespan and efficiency of your TEM6 air handler. Begin with monthly inspections of the air filter‚ replacing or cleaning it as needed. This prevents dust buildup and ensures optimal airflow. Inspect the drain line periodically for clogs‚ ensuring proper drainage to prevent water damage. Annually‚ schedule a professional inspection by a qualified HVAC technician. This professional service will include a thorough examination of all components‚ including the blower motor‚ coils‚ and electrical connections. The technician will check for any signs of wear‚ tear‚ or potential problems. They can also perform necessary cleaning or minor repairs. During the inspection‚ verify the refrigerant levels are within the recommended range. Low refrigerant levels can significantly impact the unit’s cooling efficiency. Proper lubrication of moving parts is essential. This prevents premature wear and ensures smooth operation. Consult your owner’s manual for specific lubrication recommendations and procedures. Regular maintenance reduces the risk of breakdowns and costly repairs. Keep a log of all maintenance activities‚ including dates and details of any work performed. This record aids in future troubleshooting and helps track the unit’s overall health. By following these maintenance recommendations‚ you can ensure your TEM6 air handler operates efficiently and reliably for years to come‚ providing consistent comfort and energy savings.


Be the first to reply